How do I get started with iRadeo?
Getting started with iRadeo is really simple. Just sign up, create
your station, customize, and upload your audio or create a playlist to
directly stream from your server..1. Goto IRADEO

2. Click on sign up

3. Then choose from " Basic " Pricing & Signup page. where you will offer 25MB audio storage 100MB bandwidth.

4. sign up page you must add Email, user name then password. then click signup

5. Next page click on Create new station

6. Then you will go to General Setting page

You can customize the radio as you wish...
General Settings
- Station Title: Allows you to name your station. To disable station title, uncheck the Display Title checkbox next to Station Title field.
- Player Format: Select the player format that fits your needs. You have up to 6 different templates to choose from and customize.
- Font Type: Select text style to display with two different font options, Sans-serif or Serif.
- Font Size: Select text size to display with three options, Small, Medium, or Large. By default Medium is selected as the normal font size.
- Colors: Select the colors that you want to apply to your player.
Also customize the option

Options
- Share: If enabled, allows your listeners to share your player destination via direct link.
- Embed: If enabled, allows your listeners to embed your player on their blog or website.
- Download: If enabled, allows your listeners to download all tracks that are streaming.
- Auto Play: If enabled, your station will automatically start streaming when your page loads.
- Shuffle: If enabled, will act as an automated dj and play random tracks from your station playlist.
- Loop: If enabled, will repeat your station playlist continuously.
- Track Names: If enabled, will display track names from your playlist. Note: You will need to provide the names for each track.
- Audio Ads: If enabled, will allow you to upload audio ads to your station. You can specify after how many tracks and how many times you would like your audio ads to play. Audio Ads block all player options for your listeners to allow your sponsor audio to complete streaming.
- Buy: If enabled, you can specify a link where your listeners can purchase your audio tracks or products that you are discussing.
- Playlist Streaming: Only available with Ultimate plans. If enabled, will allow you to stream all your audio tracks directly from your server using a PLS playlist.
Audio File Upload
- Only MP3 audio file formats are supported.
- You may upload multiple file at the same time.
- Track Name: With every audio file upload, you have the option to name your tracks. We recommend naming your tracks if you have Track Names option checked under Options
- Edit Track Name: Select if you want to update the name of the track.
- Delete: Select if you want to delete the track from your playlist.
- 100 audio files per page.
7. After click Save Changes.. Click on dashboard there you can customize your player settings....
click on embedded to copy the code....

your player will looks like this
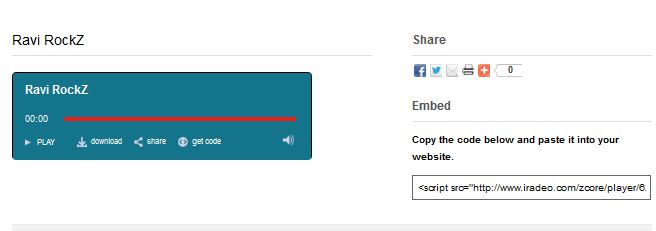
Finally you can add this player to your BLOGGER by adding HTML/Javascript gadget

It will looks like my blogger.....